Saturday, October 11, 2014

Easy Fall Crafts for Toddlers

My little guy is turning three in a month (wow, when did that happen??) and we've been having all sorts of fall fun.  We already went to the pumpkin patch in our new little town.  We didn't purchase pumpkins there, but he had great fun.  We did purchase pumpkins elsewhere and he just can't wait to carve them!

To keep the fall fun going on some of these rainy days we've had here, we did a couple of really really simple fall crafts with a few things that we already had and can be easily picked up at any craft store.

Our first craft...giant spiders (friendly ones, of course!)  All you need is some construction paper cut into circles (I had some already cut from a previous project), pipe cleaners, a hole punch, and crayons/markers/whatever.  I didn't have googly eyes, but those would make an excellent addition!

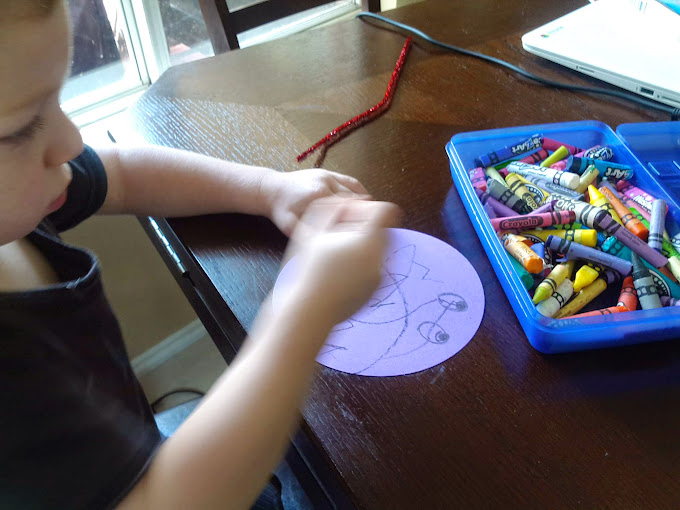
Just put eyes on the circle and let your little one decorate his/her spider with crayons or markers...if you don't mind the mess, glitter is fun too...but since I don't want to be cleaning up glitter until my son leaves for college, I stuck with crayons.  Once he was done, I punched eight holes in the edge and twisted the pipe cleaners around them to look like legs.  Bam!  Insta-spider.  He was so thrilled that he played with his spiders all day and we even folded the legs up and sent one to his aunt.  

Another craft we did, also super easy and simple, is very similar to one we did with edible finger paints a while back.  Now that he's older we used regular paint and instead of our fingers, we used a bunched up paper towel.  You'll need a canvas sheet, letter stickers, paint, and paper towels.  

On the canvas, place your letters to spell out whatever fall phrase you want.  I'm a minimalist at heart so I just said 'fall' and left him lots of room to make beautiful fall 'leaves'.  Then I basically squirted a glob of yellow, red, and orange paint on a plate and gave him a bunched up paper towel and let him have at it.  I did help a little to make sure the canvas was completely covered, but he really did most of it himself.  The fall colors blended together very nicely.  Once he was finished and before the paint was dried, I VERY CAREFULLY peeled off the letters revealing the negative image of 'fall' amongst the leaves.  Absolutely adorable and looks great next to my cinnamon broom and a colorful gourd we picked out.

It's Not Me

Ok, y'all, I got another product review for ya.  I know I've mentioned Influenster before, so I won't get too much into it now.  Basically, for those of you not in the 'know', it's a company that gives out free product samples from various places in exchange for you reviewing them on social media.  If you are active online and like free stuff, I highly recommend checking them out.

This most recent Vox Box was the It's Not Me Gillette Venus Sensitive box.  I got myself a free Gillette Sensitive razor and so far I really do like it.  I usually use whatever razors I have a coupon for, so I've used quite a variety.  Gillette is one of my go-to brands already, so I was already pretty familiar with the Venus razor.  The sensitive one is a Venus, but obviously it's geared toward those of us with sensitive skin.  If you're like me, shaving usually results in ingrowns, razor burn, or itchiness...and that's even when I use shaving cream/gel/lotion/whatever.  Nothing really seems to prevent that...and I've tried it all.  

I tried this razor both with and without shaving cream and it seems to do a pretty decent job either way.  I definitely prefer the feel of the shave itself with the cream, but if you're in a pinch, it's not bad without as it has moisturizer built right into the razor (which has 5 blades by the way).  

I will say, I didn't have a rash this time when I shaved, so it must work.  I'd definitely be willing to buy it again at around $12.99 for the initial pack and $16.99 for refills, I'll be waiting for a coupon.

Friday, August 1, 2014

Easy Steamed Mussels

So I've been seeing these beautiful photos of a bowl full of mussels that have been steamed to perfection and are sitting atop what looks like a lovely broth and thinking...man, I'd love to try that!  But in restaurants, it's usually just a bit too pricey for something I'm not sure I'll like, so I've always put off actually trying it.  Well, I finally decided to throw caution to the wind and just get it over with...but at home, where you know, I can fix myself a pb&j if it's really that awful.  As it turns out, not only was it delicious, but it was easy, too!  The whole dish was cooked in one big pot...which is a big plus for me!

I tried to find fresh mussels, but I guess it just wasn't in the cards for me...so I had to settle for frozen ones.  Which, as it turns out, saved me even more time because they were already cleaned.  For less than $2 a pound, I grabbed two pounds and a bottle of white wine...the rest was already in my pantry!

First things first, mince four or so cloves of garlic and about a quarter of a sweet onion.  In a stock pot/dutch oven, melt two tablespoons of butter.  Over medium heat, saute the onion and garlic for about 30 seconds.  Add the zest of one lemon and stir for another 30 or so seconds.  Add two cups of wine and some fresh ground black pepper.  Bring to just a boil and add the mussels.  Cover and let steam.  Since mine were frozen, it took about 10 minutes for them to thaw and open...discard any that don't open.  I poured the whole pot into a big serving bowl and served them family style with grilled, garlic-rubbed bread slices.  My husband ate his with a little shake of Tabasco on top but I ate mine as-is.  Just sop up that tasty broth in the grilled bread and put the mussel meat on top...makes for one tasty bite!


Ingredients:
2 lbs mussels, cleaned and debearded
1 lemon, both zest and wedged
2 tbsp butter, softened
1/2 c. parsley, chopped
4 cloves garlic, minced
1/4 yellow onion, minced
2 cups white wine
1 loaf of crusty bread
extra garlic for rubbing on the bread
optional: Tabasco for serving; parsley for garnish

1. Melt butter in pot.  Add onion and garlic, saute for 30 seconds.  Add lemon zest, stir and saute for additional 30 seconds.

2.  Add white wine and pepper to taste.  Bring to a boil.

3.  Add mussels and steam until most have opened.  Discard unopened shells.

4.  Add chopped parsley and stir (optional).  Serve with grilled bread.


Basic Roast Chicken and Potatoes

So here's the "sitch"...my husband is allergic to poultry.  Not sure if I've ever mentioned it, but it's weird and worth noting before I go into this recipe and why it's such a big deal for me.  I haven't cooked chicken in YEARS because I was always so afraid of cross-contamination and frankly, not willing to make two completely different proteins for one meal.  As of late, our work schedules are pretty opposite of one another, so my son and I find ourselves having dinner sans Daddy.  Which sucks.  Big time.  I miss our family meals and I really lost my passion for making nice dinners since my sole dining companion is 2 and isn't a very...appreciative diner.  We've been getting by on quick pasta dishes, loaded baked potatoes, soup, etc...you know, easy one-pot type stuff.  That is, until I had an epiphany...since I'm not cooking for the hubs, I can make chicken!  Woohoo!  I know...small victory...just give me this one, mkay?
Some of the basics...

Since I'm all grown up now, I figured I should master how to roast a whole chicken.  It's a basic recipe and easy to pull out for company...everyone loves it.  If you don't already have this one in your arsenal, read on, and if you already do...read on anyway, because this isn't your average roast chicken ;-)


Preheat your oven to 400 degrees.  Chop some red potatoes into bite sized chunks and toss with a splash of olive oil, salt, pepper, and thyme.  Toss 'em in a baking dish and set aside whilst you prepare the bird!
Mmmm butter...and other stuff.

Grab yourself some buttah' and let it soften...if you're like me and wait until the last minute to get it
out and start cooking, zap it in the microwave for about 10 seconds...that should do it.  Chop up a handful of parsley, zest a lemon, and mince 2 cloves of garlic.  Mix well and set aside.

Now, the important difference between your average roast chicken recipe and this one is the butchering of the chicken.  Some call it butterflying, others call it spatchcocking...whatever you call it, it helps the chicken cook more evenly and it can even cook faster.  Get yourself a nice, whole chicken.  Rinse and pat dry (both inside and out....and remove all the...innards).  Flip it over and, using poultry shears, cut out the spine.  Then you cut notches in the cartilage on either side of the breast bone and yank that out.  But do it nicely...you don't want to tear up your chicken.  Then you flip it over and voila! You have a beautifully butterflied chicken.  Check out this helpful video that I used to learn this technique.

Awaiting the oven...
After.  Look at all that crispy skin!
Splay out that bird on a baking sheet (rimmed, of course) and
retrieve your butter mixture.  Slather that stuff all over the top of the bird...make sure you get all the exposed skin with it...trust me.  Season with a little salt and pepper.

Both the potatoes and the chicken can go in together.  In about 30 minutes, remove the potatoes and stir them around so they get crisp on all sides and return to the oven.  Continue baking for another 15-30 minutes.  You'll know your chicken is finished when the thigh meat registers a temperature of 165 degrees and the juices run clear.  Carve it up and serve it along side those tasty taters and a fresh green salad.  YUM!
You can't tell me that doesn't look tasty!

Oh, and bonus...you can squeeze the lemon juice from that lemon you zested earlier over pretty much the entire meal and it gives it a little extra zip!


Ingredients:
1 whole chicken
2 tbsp butter, softened
1/2 c parsley, chopped
2 cloves garlic, minced
zest of 1 lemon
4-6 red potatoes, cut to 1" pieces
2 tbsp olive oil
1 tsp thyme
Salt and pepper

1.  Preheat oven to 400 degrees F.  Rinse and pat dry the chicken, removing everything from the cavity.  Spatchcock if desired and place on baking dish.

2.  Combine butter, parsley, garlic, and lemon zest.  Mix well and slather on bird.  Season liberally with salt and pepper

3.  Toss potatoes in olive oil, thyme, salt and pepper.  Place in separate baking dish.

4.  Bake together for approximately 1 hour or until internal temperature reaches 165 degrees and juices run clear.  Stir potatoes at 30 minutes and return to oven for the remainder of the hour.

Thursday, June 19, 2014

Happy Hour: Strawberry-Basil Cocktail

It's hot hot hot in central Texas and there is nothing more refreshing than a cool cocktail sipped on your own back porch.  This little gem of a drink has just FOUR ingredients and is just as easy to make in a large batch as it is to make single-serve.  Get out your muddlers y'all!

See that y'all I threw in up there?  I'm embracing my inner Texan.  If you can't beat em...


Ingredients:
3 medium strawberries, sliced
2 large basil leaves
1.5 oz bourbon
Sparkling beverage of choice (I used sparkling lemonade)
Ice

1.  In your glass, muddle together the berries and basil.  There is no wrong way to do this.

2.  Add the bourbon.  If you prefer to make it a heavier pour, go right ahead.  Top with ice and stir will with a bar spoon (you know...that long swirly lookin' one).

3.  Fill the rest of your glass with your sparkling beverage of choice.  It can be soda water, ginger ale, lemon lime soda, or if you're like me...sugar free sparkling lemonade.  If you want to get fancy, garnish with an extra strawberry and a sprig of basil.  It's freakin' delicious so drink up!


Baked Eggs in Portabellos

If you're looking to get healthier, it's no secret that cutting down on red meat will make a big difference to your diet.  It can be difficult to feel fully satisfied at dinner without having that slice of protein, which is why I made this dish for dinner tonight.  The large mushroom with an egg delivers a punch of protein and a very satisfying bite.  Tonight, I served it alongside southwestern hashbrowns simply because that's what I had on hand.  However, I think it would be equally delicious served with a salad and a fruity vinagrette or even with some roasted asparagus and a squirt of lemon...yum!

Ingredients:
2 large portabello caps
2 large eggs
1 green onion, sliced
cooking spray
salt and pepper

1.  Preheat the oven to 375.  Meanwhile, clean your mushrooms and remove the stems.  Pat dry and leave the gills intact.

2.  Layer a small baking dish with foil and spray with cooking spray.  Place your mushrooms in the dish and sprinkle with half the green onions.  Top with a single egg, careful to keep it from running off the side of your 'shroom.

3.  Sprinkle with salt and pepper to taste and bake until the eggs are cooked to your liking.  I, myself, prefer the yolks to be a bit runny, so mine took about 20 minutes.  

4.  Serve with your favorite side and garnish with the additional green onion slices.  Enjoy!


Wednesday, June 11, 2014

Healthy PB&J Popcicles

There is nothing that brings me back to my childhood summers like a good popsicle.  I think we all remember sitting on the front porch trying to finish it before the whole thing melts and runs down your arm.  And being a completely sticky, stained mess by the time you're done.  The only problem is most of these classic treats are so full of sugar and food coloring...probably not all that good for you.  So the obvious solution is to just make your own.  The possibilities are endless...and you can totally just use some good organic fruit juice and call it a day.  But you know me...gotta take it one step further...made my own grape juice and a pb/greek yogurt blend.

Grape Juice:
1 cup water in a medium sauce pan
enough grapes to fill the water without coming up out of the water 

Boil until the grapes have all burst and look dull.  
Strain through a fine mesh strainer, smooshing (very technical term) the grapes to extract as much juice as possible.  
Allow to cool completely.

You *can* add sugar to the water before boiling...but grapes are pretty sweet on their own...really up to you.

PB swirl:
1/4 c greek yogurt, plain
2 tbsp peanut butter, creamy
1 tsp honey

Mix until everything is incorporated and smooth.  
Put in a piping bag (or in my case, a sandwich bag with a corner snipped off).

In your pop molds, pipe the pb mixure around the sides...doesn't have to be perfect since you're pouring liquid over it that might displace it anyway.
See...not perfect...but still tasty!
Pour cooled grape juice into each mold.  

Place your sticks/handles, and freeze until solid.

Run the mold under some warm water to loosen before removing the pops.

These really tasted like pb&j...and were freaking awesome!  My son loved them and wanted more.  We're definitely going to try some other flavors soon!
Ayden approved!