Saturday, October 11, 2014

Easy Fall Crafts for Toddlers

My little guy is turning three in a month (wow, when did that happen??) and we've been having all sorts of fall fun.  We already went to the pumpkin patch in our new little town.  We didn't purchase pumpkins there, but he had great fun.  We did purchase pumpkins elsewhere and he just can't wait to carve them!

To keep the fall fun going on some of these rainy days we've had here, we did a couple of really really simple fall crafts with a few things that we already had and can be easily picked up at any craft store.

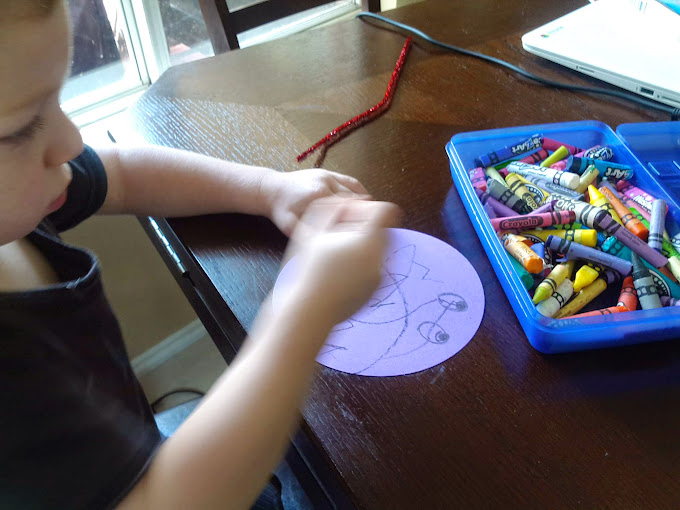
Our first craft...giant spiders (friendly ones, of course!)  All you need is some construction paper cut into circles (I had some already cut from a previous project), pipe cleaners, a hole punch, and crayons/markers/whatever.  I didn't have googly eyes, but those would make an excellent addition!

Just put eyes on the circle and let your little one decorate his/her spider with crayons or markers...if you don't mind the mess, glitter is fun too...but since I don't want to be cleaning up glitter until my son leaves for college, I stuck with crayons.  Once he was done, I punched eight holes in the edge and twisted the pipe cleaners around them to look like legs.  Bam!  Insta-spider.  He was so thrilled that he played with his spiders all day and we even folded the legs up and sent one to his aunt.  

Another craft we did, also super easy and simple, is very similar to one we did with edible finger paints a while back.  Now that he's older we used regular paint and instead of our fingers, we used a bunched up paper towel.  You'll need a canvas sheet, letter stickers, paint, and paper towels.  

On the canvas, place your letters to spell out whatever fall phrase you want.  I'm a minimalist at heart so I just said 'fall' and left him lots of room to make beautiful fall 'leaves'.  Then I basically squirted a glob of yellow, red, and orange paint on a plate and gave him a bunched up paper towel and let him have at it.  I did help a little to make sure the canvas was completely covered, but he really did most of it himself.  The fall colors blended together very nicely.  Once he was finished and before the paint was dried, I VERY CAREFULLY peeled off the letters revealing the negative image of 'fall' amongst the leaves.  Absolutely adorable and looks great next to my cinnamon broom and a colorful gourd we picked out.

It's Not Me

Ok, y'all, I got another product review for ya.  I know I've mentioned Influenster before, so I won't get too much into it now.  Basically, for those of you not in the 'know', it's a company that gives out free product samples from various places in exchange for you reviewing them on social media.  If you are active online and like free stuff, I highly recommend checking them out.

This most recent Vox Box was the It's Not Me Gillette Venus Sensitive box.  I got myself a free Gillette Sensitive razor and so far I really do like it.  I usually use whatever razors I have a coupon for, so I've used quite a variety.  Gillette is one of my go-to brands already, so I was already pretty familiar with the Venus razor.  The sensitive one is a Venus, but obviously it's geared toward those of us with sensitive skin.  If you're like me, shaving usually results in ingrowns, razor burn, or itchiness...and that's even when I use shaving cream/gel/lotion/whatever.  Nothing really seems to prevent that...and I've tried it all.  

I tried this razor both with and without shaving cream and it seems to do a pretty decent job either way.  I definitely prefer the feel of the shave itself with the cream, but if you're in a pinch, it's not bad without as it has moisturizer built right into the razor (which has 5 blades by the way).  

I will say, I didn't have a rash this time when I shaved, so it must work.  I'd definitely be willing to buy it again at around $12.99 for the initial pack and $16.99 for refills, I'll be waiting for a coupon.

Friday, August 1, 2014

Easy Steamed Mussels

So I've been seeing these beautiful photos of a bowl full of mussels that have been steamed to perfection and are sitting atop what looks like a lovely broth and thinking...man, I'd love to try that!  But in restaurants, it's usually just a bit too pricey for something I'm not sure I'll like, so I've always put off actually trying it.  Well, I finally decided to throw caution to the wind and just get it over with...but at home, where you know, I can fix myself a pb&j if it's really that awful.  As it turns out, not only was it delicious, but it was easy, too!  The whole dish was cooked in one big pot...which is a big plus for me!

I tried to find fresh mussels, but I guess it just wasn't in the cards for me...so I had to settle for frozen ones.  Which, as it turns out, saved me even more time because they were already cleaned.  For less than $2 a pound, I grabbed two pounds and a bottle of white wine...the rest was already in my pantry!

First things first, mince four or so cloves of garlic and about a quarter of a sweet onion.  In a stock pot/dutch oven, melt two tablespoons of butter.  Over medium heat, saute the onion and garlic for about 30 seconds.  Add the zest of one lemon and stir for another 30 or so seconds.  Add two cups of wine and some fresh ground black pepper.  Bring to just a boil and add the mussels.  Cover and let steam.  Since mine were frozen, it took about 10 minutes for them to thaw and open...discard any that don't open.  I poured the whole pot into a big serving bowl and served them family style with grilled, garlic-rubbed bread slices.  My husband ate his with a little shake of Tabasco on top but I ate mine as-is.  Just sop up that tasty broth in the grilled bread and put the mussel meat on top...makes for one tasty bite!


Ingredients:
2 lbs mussels, cleaned and debearded
1 lemon, both zest and wedged
2 tbsp butter, softened
1/2 c. parsley, chopped
4 cloves garlic, minced
1/4 yellow onion, minced
2 cups white wine
1 loaf of crusty bread
extra garlic for rubbing on the bread
optional: Tabasco for serving; parsley for garnish

1. Melt butter in pot.  Add onion and garlic, saute for 30 seconds.  Add lemon zest, stir and saute for additional 30 seconds.

2.  Add white wine and pepper to taste.  Bring to a boil.

3.  Add mussels and steam until most have opened.  Discard unopened shells.

4.  Add chopped parsley and stir (optional).  Serve with grilled bread.


Basic Roast Chicken and Potatoes

So here's the "sitch"...my husband is allergic to poultry.  Not sure if I've ever mentioned it, but it's weird and worth noting before I go into this recipe and why it's such a big deal for me.  I haven't cooked chicken in YEARS because I was always so afraid of cross-contamination and frankly, not willing to make two completely different proteins for one meal.  As of late, our work schedules are pretty opposite of one another, so my son and I find ourselves having dinner sans Daddy.  Which sucks.  Big time.  I miss our family meals and I really lost my passion for making nice dinners since my sole dining companion is 2 and isn't a very...appreciative diner.  We've been getting by on quick pasta dishes, loaded baked potatoes, soup, etc...you know, easy one-pot type stuff.  That is, until I had an epiphany...since I'm not cooking for the hubs, I can make chicken!  Woohoo!  I know...small victory...just give me this one, mkay?
Some of the basics...

Since I'm all grown up now, I figured I should master how to roast a whole chicken.  It's a basic recipe and easy to pull out for company...everyone loves it.  If you don't already have this one in your arsenal, read on, and if you already do...read on anyway, because this isn't your average roast chicken ;-)


Preheat your oven to 400 degrees.  Chop some red potatoes into bite sized chunks and toss with a splash of olive oil, salt, pepper, and thyme.  Toss 'em in a baking dish and set aside whilst you prepare the bird!
Mmmm butter...and other stuff.

Grab yourself some buttah' and let it soften...if you're like me and wait until the last minute to get it
out and start cooking, zap it in the microwave for about 10 seconds...that should do it.  Chop up a handful of parsley, zest a lemon, and mince 2 cloves of garlic.  Mix well and set aside.

Now, the important difference between your average roast chicken recipe and this one is the butchering of the chicken.  Some call it butterflying, others call it spatchcocking...whatever you call it, it helps the chicken cook more evenly and it can even cook faster.  Get yourself a nice, whole chicken.  Rinse and pat dry (both inside and out....and remove all the...innards).  Flip it over and, using poultry shears, cut out the spine.  Then you cut notches in the cartilage on either side of the breast bone and yank that out.  But do it nicely...you don't want to tear up your chicken.  Then you flip it over and voila! You have a beautifully butterflied chicken.  Check out this helpful video that I used to learn this technique.

Awaiting the oven...
After.  Look at all that crispy skin!
Splay out that bird on a baking sheet (rimmed, of course) and
retrieve your butter mixture.  Slather that stuff all over the top of the bird...make sure you get all the exposed skin with it...trust me.  Season with a little salt and pepper.

Both the potatoes and the chicken can go in together.  In about 30 minutes, remove the potatoes and stir them around so they get crisp on all sides and return to the oven.  Continue baking for another 15-30 minutes.  You'll know your chicken is finished when the thigh meat registers a temperature of 165 degrees and the juices run clear.  Carve it up and serve it along side those tasty taters and a fresh green salad.  YUM!
You can't tell me that doesn't look tasty!

Oh, and bonus...you can squeeze the lemon juice from that lemon you zested earlier over pretty much the entire meal and it gives it a little extra zip!


Ingredients:
1 whole chicken
2 tbsp butter, softened
1/2 c parsley, chopped
2 cloves garlic, minced
zest of 1 lemon
4-6 red potatoes, cut to 1" pieces
2 tbsp olive oil
1 tsp thyme
Salt and pepper

1.  Preheat oven to 400 degrees F.  Rinse and pat dry the chicken, removing everything from the cavity.  Spatchcock if desired and place on baking dish.

2.  Combine butter, parsley, garlic, and lemon zest.  Mix well and slather on bird.  Season liberally with salt and pepper

3.  Toss potatoes in olive oil, thyme, salt and pepper.  Place in separate baking dish.

4.  Bake together for approximately 1 hour or until internal temperature reaches 165 degrees and juices run clear.  Stir potatoes at 30 minutes and return to oven for the remainder of the hour.

Thursday, June 19, 2014

Happy Hour: Strawberry-Basil Cocktail

It's hot hot hot in central Texas and there is nothing more refreshing than a cool cocktail sipped on your own back porch.  This little gem of a drink has just FOUR ingredients and is just as easy to make in a large batch as it is to make single-serve.  Get out your muddlers y'all!

See that y'all I threw in up there?  I'm embracing my inner Texan.  If you can't beat em...


Ingredients:
3 medium strawberries, sliced
2 large basil leaves
1.5 oz bourbon
Sparkling beverage of choice (I used sparkling lemonade)
Ice

1.  In your glass, muddle together the berries and basil.  There is no wrong way to do this.

2.  Add the bourbon.  If you prefer to make it a heavier pour, go right ahead.  Top with ice and stir will with a bar spoon (you know...that long swirly lookin' one).

3.  Fill the rest of your glass with your sparkling beverage of choice.  It can be soda water, ginger ale, lemon lime soda, or if you're like me...sugar free sparkling lemonade.  If you want to get fancy, garnish with an extra strawberry and a sprig of basil.  It's freakin' delicious so drink up!


Baked Eggs in Portabellos

If you're looking to get healthier, it's no secret that cutting down on red meat will make a big difference to your diet.  It can be difficult to feel fully satisfied at dinner without having that slice of protein, which is why I made this dish for dinner tonight.  The large mushroom with an egg delivers a punch of protein and a very satisfying bite.  Tonight, I served it alongside southwestern hashbrowns simply because that's what I had on hand.  However, I think it would be equally delicious served with a salad and a fruity vinagrette or even with some roasted asparagus and a squirt of lemon...yum!

Ingredients:
2 large portabello caps
2 large eggs
1 green onion, sliced
cooking spray
salt and pepper

1.  Preheat the oven to 375.  Meanwhile, clean your mushrooms and remove the stems.  Pat dry and leave the gills intact.

2.  Layer a small baking dish with foil and spray with cooking spray.  Place your mushrooms in the dish and sprinkle with half the green onions.  Top with a single egg, careful to keep it from running off the side of your 'shroom.

3.  Sprinkle with salt and pepper to taste and bake until the eggs are cooked to your liking.  I, myself, prefer the yolks to be a bit runny, so mine took about 20 minutes.  

4.  Serve with your favorite side and garnish with the additional green onion slices.  Enjoy!


Wednesday, June 11, 2014

Healthy PB&J Popcicles

There is nothing that brings me back to my childhood summers like a good popsicle.  I think we all remember sitting on the front porch trying to finish it before the whole thing melts and runs down your arm.  And being a completely sticky, stained mess by the time you're done.  The only problem is most of these classic treats are so full of sugar and food coloring...probably not all that good for you.  So the obvious solution is to just make your own.  The possibilities are endless...and you can totally just use some good organic fruit juice and call it a day.  But you know me...gotta take it one step further...made my own grape juice and a pb/greek yogurt blend.

Grape Juice:
1 cup water in a medium sauce pan
enough grapes to fill the water without coming up out of the water 

Boil until the grapes have all burst and look dull.  
Strain through a fine mesh strainer, smooshing (very technical term) the grapes to extract as much juice as possible.  
Allow to cool completely.

You *can* add sugar to the water before boiling...but grapes are pretty sweet on their own...really up to you.

PB swirl:
1/4 c greek yogurt, plain
2 tbsp peanut butter, creamy
1 tsp honey

Mix until everything is incorporated and smooth.  
Put in a piping bag (or in my case, a sandwich bag with a corner snipped off).

In your pop molds, pipe the pb mixure around the sides...doesn't have to be perfect since you're pouring liquid over it that might displace it anyway.
See...not perfect...but still tasty!
Pour cooled grape juice into each mold.  

Place your sticks/handles, and freeze until solid.

Run the mold under some warm water to loosen before removing the pops.

These really tasted like pb&j...and were freaking awesome!  My son loved them and wanted more.  We're definitely going to try some other flavors soon!
Ayden approved!

Tuesday, June 3, 2014

TLC Vox Box!

This is not the first time I've raved about how much I love Influenster.  Seriously guys, if you haven't signed up, then you must just not like getting cool stuff for free.  If you want to join and get free stuff like I've gotten, click here and sign up.  It's fun, easy, and did I mention you get free stuff??

This will be the fourth Vox Box I've gotten from Influenster.  This one is called the TLC Vox Box and it's exclusively for mommies!  It's got a few things that I can use with my little guy to keep him happy and healthy, and a few that are just for me...I might even share with my husband.  Because all parents need a little TLC every now and then right?

So what does it mean to get a little TLC from Influenster?  Read on...

Neosporin Neo To Go!
$4.97-$7.50
Neosporin Neo To Go! is a convenient no touch, no sting spray that fits anywhere to give you infection protection, plus pain relief, on the go.  It is specially designed for one-handed use and is great for your purse, kitchen, desk, workshop, golf, gym, or travel bag.

I'm not going to lie, I'm a little embarrassed to say I haven't already tried this item.  My son is 2 and full of energy.  As a result, we have lots of boo-boos that will really benefit from this being in Mommy's bag.  I will be posting my review here soon!

Breyers Gelato Indugences
$4.49-$5.99
Breyers, the brand known for bringing families together to enjoy delicious frozen treats for more than 140 years, is expanding it portfolio with the introduction of new Breyers Gelato Indulgences.  Each of the four delicious varieties features a trio of textures-creamy gelato, luscious sauce and gourmet toppings-for the ultimate indulgence.  To support the launch of Breyers Gelato Indulgences, this campaign will show couples how to create the perfect date night at home-and have a new reason to "spoon."

I think I'm most excited about this item...I can't wait to go pick it up from my local grocery store and enjoy it with my hubby.  Check back here for a link to my pinterest board with tips for creating the ultimate at-home date night with Breyers!

Ivory Bar Soap
I love the vintage-y packaging!
$3.99 for a 10-pack
Ivory bar soap is 99.44% pure clean & simple and contains no dyes or heavy perfumes.  Plus, with how gentle Ivory is on skin, it's no wonder it's recommended by 4 out of 5 moms.

I have to admit, I'm not a huge fan of bar soap.  However, at $3.99 for 10 bars, I'm definitely willing to give it the old college try.  Seriously...that's 39 cents per bar!  Plus, I have really sensitive skin, so I'm looking forward to seeing how my skin responds to Ivory.  Stay tuned for an update!

AVON Anew Reversalist Express Wrinkle Smoother
Beautiful and sleek
$30
Introducing Anew Reversalist Express Wrinkle Smoother.  This translucent balm BLURS the look of WRINKLES on the forehead & around eyes INSTANTLY!  Use our fingers to gently pat onto the skin.  The cream-to-powder skin perfector delivers a silky smooth virtually line-free look for skin that gets you noticed!  Anew You starts today!  Visit AVON.com and receive 15% off your Anew purchase of $50 or more with the code ANEW15.  Offer code valid until 8/1/14 on AVON.com direct delivery orders only.

Wrinkles-ugh.  No one likes to admit they're getting older and those fine lines are a dead giveaway.  Of course the best thing to do is prevent them with good sunscreen and staying hydrated.  But for those of us who erred in our youth by sunning ourselves hoping for that elusive perfect tan...we need a little Anew.  I'm in my late 20's and they say you should start taking anti-aging measures by the time you turn 30.  So let's get on top of it ladies!

Puffs To Go
$0.49 per single pack
Puffs To Go are perfect for use in the car, in your purse, on-the-go, wherever you go!  Plus, Puffs are Dermatologist tested to be gentle.

I honestly laughed when I pulled this out of my box.  You have no idea how many of these things I've gone through in the last month alone.  I'm NEVER without my Puffs to go.  NEVER.  If it's not my son who needs a boogie wiped from his nose, my husband is asking for them because he has allergies. While I've already tried these and know how much I love them, I'm grateful since it's one less thing I have to remember at the store.

Shell Fuel Rewards Network Card
The Fuel Rewards Network program at Shell is a free loyalty program that helps you save money on fuel.  For a limited time, new members save 25 cents per gallon on their second fill up and 3 cents every time after!

It just so happens we have a Shell down the street from our new house and they also have the lowest gas prices in our area.  Needless to say, if there's a way to save even more money on gas, I'm all for it.  What's even better about this program?  It's free for you even if you didn't get a TLC vox box!  Just go to your local Shell station and pick up a card, register it online, and BOOM you're saving money.  You're welcome.
Sunday, June 1, 2014

I think I'm becoming a morning person...

Ever since starting my job in January, I've had to be up at 5am since my shift starts at 6.  It was rough at first since I was never a morning person.  I hated mornings.  I hated being up before the sun came up; I hated rousing myself from a peaceful slumber and climbing out of my soft, comfy bed.  But now that it's been a few months, I think things have changed.

It's Sunday morning and everyone else, including the dogs, are still asleep and quiet in the other room.  So far, I've brewed a cup of coffee, read a magazine from last month that still hadn't been touched, and I'm contemplating actually doing my hair properly today instead of my usual mom-do of a pony tail haphazardly thrown on the back of my head.

But instead I think I'll sit here and finish my coffee and listen to the birds chirping outside my sun-filled window...because I won't be able to hear them after everyone wakes up.

So, I guess my point is...things really do change with age.  And if you're a mom, or even just a really busy person without kids, getting up an extra hour before your day really needs to start can become a worth-while ritual.  I am totally ready to wrangle my two-year-old and find my husbands keys/wallet/cellphone/pants/whatever-he-lost-but-can't-find...yup, I'm ready to greet the day!

Saturday, May 17, 2014

Loaded Nachos

Saturday is my favorite day of the week.  Aside from the fact that I don't have to get up at 5am to go to work, it's the only day that my husband and I have off together.  So Saturdays are designated for family time.  Today, we explored bits of our new town and had breakfast tacos at a local eatery (apparently breakfast tacos are a big deal down here).  So, since we had such a filling breakfast, we didn't want much for lunch but knew we'd need a little something before dinner.  One of our go-to 'slightly-more-than-a-snack-but-less-than-a-meal' foods is a nice plate of nachos.
Look at all that yumminess!!

First off, we don't just slop toppings over a big pile of chips.  We get the Scoops and carefully fill each little cup with the toppings so every single bite has every single topping.  Is it tedious?  A little.  Is it worth it?  You bet!

So first step is to lay those suckers out on a cookie sheet.  If you don't like scrapping off baked cheese, I recommend lining it with foil.  Put a pinch of cheddar in the bottom of each scoop.  Then add all your desired toppings...this time we did diced onion, red bell pepper, and leftover taco meat.  Then I top them off with a little more cheese...this time I used Monterrey jack on the tops.  Bake at 350 for 5-10 minutes depending on how melty you like em...just watch them and pull them out when they look good.

Hands off, guys, we're not ready to dig in yet...

Then we go to the cold toppings.  These are topped with diced tomatoes, greek yogurt (in place of sour cream), chojita cheese, and chopped cilantro.  I also like to dot a bit of hot sauce on top sometimes...just depends on how spicy you want them.

The sky is the limit when it comes to combinations.  It's also a great way to use up leftover meat and veggies.   And you can make as many or as few as you like.  We normally just put the pan between us at the table and dig in.  Our 2 year old son loves them too...they're just his size!  Serve with a cold glass of your favorite beverage and enjoy!

Monday, May 12, 2014

Long Time No See/Lamb with Garlic and Lemon

I'm painfully aware of how much I've neglected this blog recently.  For that, I truly apologize.  Let me fill you in on all the craziness that's been going on around here...

A few months ago, I went back to work.  It was just the right decision for our family, so as much as I miss spending every moment with my son and having more free time to work on this blog, it was something I just had to do.  So far, I'm enjoying my work and since I work from home, I'm still able to spend a lot of time with my family.  But sadly, I have less time to experiment in the kitchen...but now that I've settled into the groove of things, I plan to get back to it!

A few weeks ago, our little family moved from Florida to Texas, which believe it or not, is a really long drive.  My husband and I loaded up the largest moving truck you can rent yourself and hauled all our stuff and three dogs out to Texas in one straight shot.  It was the longest. drive. ever.  I never want to see the inside of a car again.  We got unpacked and settled in as much as possible before our son flew out (accompanied by my mother-in-law) to join us in our new home.  He's been adjusting nicely, but there is still the question of when are we going 'home' that gets a little hard to answer.

But now that we're settled and getting back to a regular routine, I have a moment to write to you all and get back in the kitchen...and I couldn't be happier about it!  My first 'real' meal in the new house was lamb chops with garlic and lemon served with sweet potatoes and spiced butter and broccoli.  It was ah-maz-ing!  Confession:  this was the first time I cooked lamb.  My husband was all, "make sure you know what you're doing--that was expensive meat!"  Yeah...no pressure.  I figured you can't go wrong with garlic right?

Ingredients: 
2 lbs lamb chops (approx 8 1" thick chops, trimmed)
10 cloves garlic, chopped
1 lemon 
2-3 tbsp fresh chopped parsley
3 tbsp olive oil
3 tbsp water
salt and pepper

1.  Add oil to large skillet and heat to medium/medium-high heat.  Season both sides of lamb with salt and pepper.  Sear both sides for about 5 minutes each (this will get them medium-medium rare).  Remove and set aside.

2.  Cut lemon in half and squeeze juice into pan, add lemon halves cut side down.  Lower temp slightly and add remainder of ingredients.  Sautee for about 3 minutes or until garlic is tender.  Keep things moving...DO NOT BURN THE GARLIC.  It gets bitter when it burns...gross.  

3.  Pour garlic/lemon/herb mixture over the chops and serve.  Don't forget to serve those caramelized lemon halves with it!  Squeeze the warm lemons over the chops...the heat will surely release some extra juice from inside there and it adds a really nice mellow pop of flavor!

Now, guys, I have to be honest...this was freaking awesome.  I'm not even a huge fan of lamb if it's not slathered in tzatzkiki sauce and I ate every last morsel of this stuff.   If you're like me and have never made lamb before, don't be afraid to try it...it's not as intimidating as it looks.  I highly recommend you give this recipe a try.  Still not interested in trying lamb?  That's a-ok...I totally get it.  Replace the lamb with your favorite cut of meat, and I'm sure the garlic, lemon, and parsley will make it equally delicious!

Sunday, January 12, 2014

We're Moving!

Change is part of life.  It's not always fun or easy, but it's necessary.  For our little family, it's time to make a pretty big change.  We're moving.  Now, there is a small possibility that we'll simply be moving to the other side of Orlando, but more likely we'll be moving to San Marcos, TX (it really all depends on my husbands company and where they need him more).  Bottom line is, we're moving out of the home to which we brought our son home from the hospital.  It's bittersweet...we have created many fond memories here and we will truly miss our family and friends in Orlando, yet the prospect of a fresh start in a new city is exciting!

I will be sharing our journey with you on this blog and giving out some tips and tricks along the way for how to make an easy  less difficult move.

As of right now, my focus is to purge and organize.  You don't realize how much stuff you've accumulated until it's time to move it all.  And man, do we have a lot of stuff.  My first piece of advice here is simple: get real.  Are you REALLY going to wear those skinny clothes ever again?  Not likely...you'll want to buy new stuff after losing weight.  Are you REALLY going to fix that lamp you got for $1 at a garage sale last summer?  Probably not.  Relieve yourself of the junk that just takes up space.  If you find yourself on the fence about something or just having a hard time letting go in general...let me break it down for you like this:  Is the cost to replace the item greater than the cost to move the item?  If yes, and you really believe that in your new home you will have room for and use said item, then go ahead and pack it.  If not, then ditch it.  You can sell it before moving (more on this later) and put the money towards a replacement in your new home.  

Going through everything is overwhelming, especially if you don't have a lot of time.  To make it more manageable, break it down by room.  Start with the easier rooms like bedrooms and bathrooms and work your way up to the harder ones like the kitchen and garage.  It's also best to work from the top of your house down, just like with cleaning.  

Designate an area for things you're getting rid of.  Bins or boxes labeled 'donate' and 'sell' are a great way to keep things organized.  Of course anything you're throwing away should go directly into the garbage bin outside...don't let it clutter up your house!  

Check back for more tips on moving and to see our progress!

Monday, January 6, 2014

Coming soon...

My sincerest apologies for the silence on this blog as of late.  It's been a busy holiday season and I have been without a laptop for much of it.  Just yesterday, my wonderful husband bought me a brand spanking new laptop and I'm so excited to put it to work with this blog!

I hope everyone put my post about holiday prep to good use and that it helped you have a stress-free holiday season!  Now that the new year has begun, I have some new goals for myself and I'll try to share my progress along the way.

Goal 1: Get organized.
We plan to move to a new home this year.  We're not 100% about the when or where...it will be in 6 months or less and we will either move across town or to Texas.  Everything depends on my husband's job and where they need him to be.  So in preparation for moving, I'm starting to purge and organize now so that moving will be as easy as possible.  I've started by weeding through my son's toys and clothes.  Anything broken went into the trash, things he's outgrown are getting passed down to his cousin, and anything else is getting donated.  I already have three large boxes of things out of his room alone!

Goal 2: Get healthy.
Last year, my husband and I started on this goal by eliminating junk food and in general making healthier choices.  Over the holidays we let a lot slide but we're ready to get back on the wagon.  We've decided to join a gym since now is usually the best time to do so because gyms tend to have specials in January.

Goal 3: Stop being wasteful.
Wastefulness really bugs me.  I hate throwing perfectly good things away.  You can ask my husband...I get really mad when I have to throw food out and I'm a bit of a pack rat with other things because I can't stand the idea of throwing something out and a month down the road needing it.  However, I'm also sick of having no spare storage space in our home due to all the stuff I'm hanging on to.  This kind of goes hand in hand with my first goal for this year...I do not want to purchase anything new that I'm not going to use.  No more impulse buys just because something is a good deal!  No more knick-knacks for the house...we have enough decor and really, with a toddler and three dogs, it's not a worthwhile investment.  So...more restraint when shopping and as far as food goes, I'm going to start cooking smarter.  This means cooking meals that will either be finished off the same night it's cooked or will make a meal that will definitely get eaten the next day!