Showing posts with label diy. Show all posts

Saturday, October 11, 2014

Easy Fall Crafts for Toddlers

My little guy is turning three in a month (wow, when did that happen??) and we've been having all sorts of fall fun.  We already went to the pumpkin patch in our new little town.  We didn't purchase pumpkins there, but he had great fun.  We did purchase pumpkins elsewhere and he just can't wait to carve them!

To keep the fall fun going on some of these rainy days we've had here, we did a couple of really really simple fall crafts with a few things that we already had and can be easily picked up at any craft store.

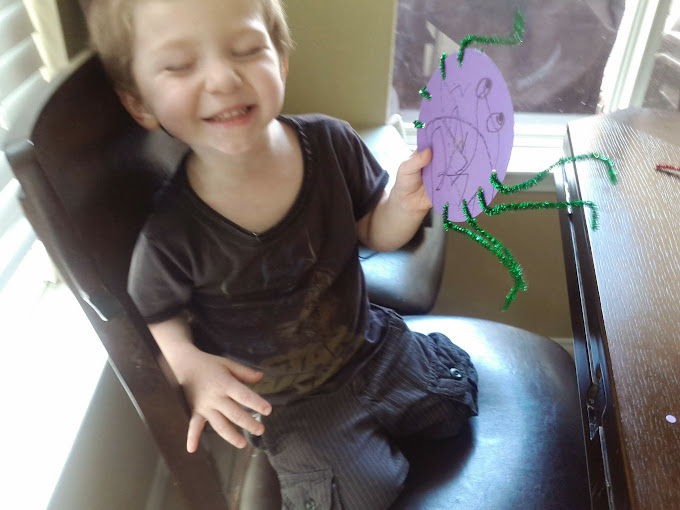
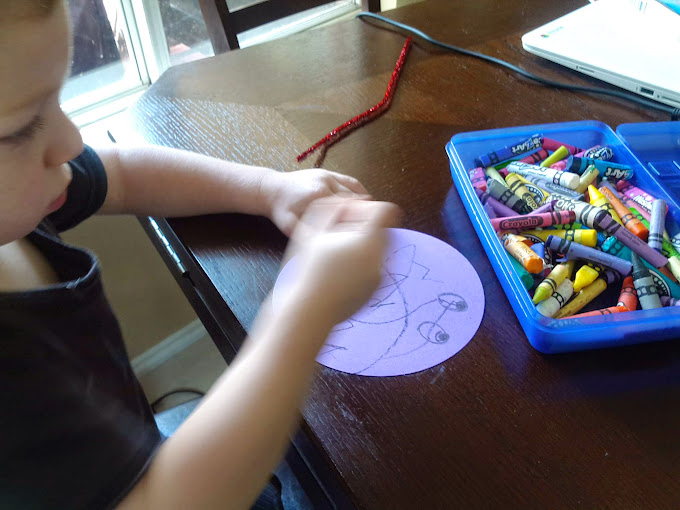
Our first craft...giant spiders (friendly ones, of course!)  All you need is some construction paper cut into circles (I had some already cut from a previous project), pipe cleaners, a hole punch, and crayons/markers/whatever.  I didn't have googly eyes, but those would make an excellent addition!

Just put eyes on the circle and let your little one decorate his/her spider with crayons or markers...if you don't mind the mess, glitter is fun too...but since I don't want to be cleaning up glitter until my son leaves for college, I stuck with crayons.  Once he was done, I punched eight holes in the edge and twisted the pipe cleaners around them to look like legs.  Bam!  Insta-spider.  He was so thrilled that he played with his spiders all day and we even folded the legs up and sent one to his aunt.  

Another craft we did, also super easy and simple, is very similar to one we did with edible finger paints a while back.  Now that he's older we used regular paint and instead of our fingers, we used a bunched up paper towel.  You'll need a canvas sheet, letter stickers, paint, and paper towels.  

On the canvas, place your letters to spell out whatever fall phrase you want.  I'm a minimalist at heart so I just said 'fall' and left him lots of room to make beautiful fall 'leaves'.  Then I basically squirted a glob of yellow, red, and orange paint on a plate and gave him a bunched up paper towel and let him have at it.  I did help a little to make sure the canvas was completely covered, but he really did most of it himself.  The fall colors blended together very nicely.  Once he was finished and before the paint was dried, I VERY CAREFULLY peeled off the letters revealing the negative image of 'fall' amongst the leaves.  Absolutely adorable and looks great next to my cinnamon broom and a colorful gourd we picked out.
Monday, June 10, 2013

Father's Day Craft

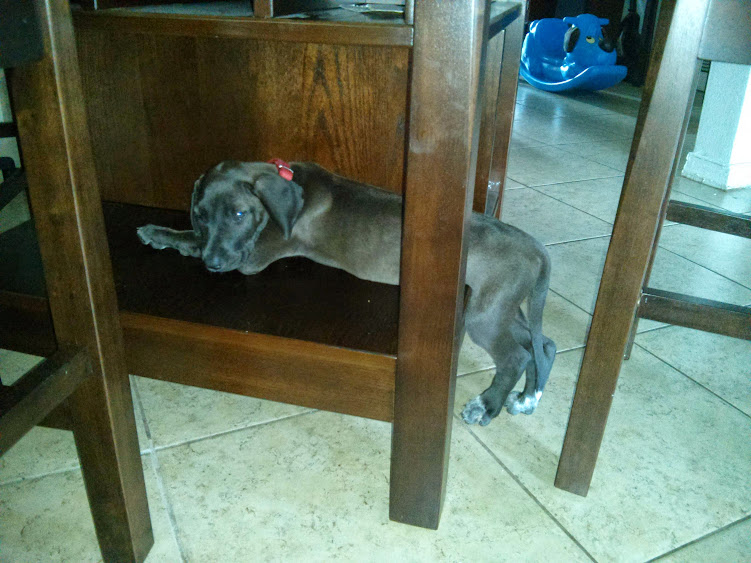
Last year, Ayden and I had a blast making our finger paint art.  This year, the pressure was on to top that!  So...we got Daddy a new puppy!  We adopted (after much discussion) a Great Dane-Shepherd mix puppy and we're so excited!  Meet Kahlua Pi...
Yes, this is how she likes to lay...don't ask.


Ok, so not what you were expecting?  Thought so...  No worries, Ayden and I still whipped up a little something for Father's Day! We made two different things for two very special guys.  A shadow box and hand print coasters.

The shadowbox is super easy.  I purchased a shadow box frame from Michael's, a sheet of peel-and-stick scrapbook paper, photo corners, pre-cut paper circles, some raffia ribbon, glue, acrylic paint and a 3D sticker. Here's the finished product:


The picture really doesn't do the project justice, but I'm having issues finding good light these days (my apologies).  On the top left is Ayden's hand print on the pre-cut circle paper.  Super easy...using a sponge wedge, I coated my little man's hand with acrylic paint, stamped it onto the paper and used a baby wipe to wash of the paint...easy-peasy.  I poked a couple holes in the top, tied a raffia bow, and glued it to the shadow box.  Top right is the 3D sticker, found in the scrapbooking aisle.  On the bottom are two prints from our wedding secured to the box with photo corners.  The cool thing about the photo corners is they're peel and stick, so they were easy to use and also, if the recipient should desire to change the photos, they're easy to remove...but they won't fall off on their own.

Project number two is a set of slate coasters with hand prints on them (yes, I'm in a hand print phase...so sue me).  You can do this project on regular tiles if you prefer...I just liked the look of the slate and they already had felt on the bottom to keep them from scratching the furniture.  

To make these all you need is your base of choice (slate coasters, tiles, whatever), acrylic paint, sponge brush, and modge podge.  Make sure your base is clean and dry.  Coat your little one's hand in paint and stamp it onto the coaster.  Let dry completely.  Using sponge brush, apply a coat of modge podge.  Allow to dry completely.  Add a second coat of modge podge if desired.  

Now I will say this about my coasters...if I had it to do over again, I'd go with white paint...or pretty much any color besides 'bloody hand print red.'  Maybe I should save them for a Halloween gift??  But other than that, they turned out pretty good and were super easy.  And cheap...did I mention this project was less than $10?

Well friends, happy crafting and to all the dads out there, Happy Father's Day!  


Saturday, June 1, 2013

Grad Gift

Both my husband and I had a sister graduate this year!  So hard to believe both girls are all grown up *tear.*  For my hubby's sister's gift, we chose to give the gift of cold, hard cash.  I'm sure it's just her size.  However, to warm it up a bit...it just seems so impersonal...I had to add a little flare.

Ok, guys, so the original idea was this:  Roll up the bills, insert into balloon, fill with helium, and tie to something heavy.  Look...floating money!  And it was an awesome idea...until I found out that apparently helium goes bad after a while.  You see, I had a tank leftover from my bridal shower...my mom only blew up a few balloons and the tank has enough gas for 30, so surely there was enough left.  However, I blew up the first balloon and it sank like a rock.  PLAN B!

When you don't want to spend another $20 on freaking helium and you don't have time to run to your nearest balloon retailer for a shot of the stuff, you have to get creative.  So I took my money-filled balloons and tied them to wooden skewers...you know, the kind you put food on.  I curled the ribbon and tied them to a photo holder and voila! it worked.  So yeah, not as cool as intended, but it still turned out better than sticking cash in an envelope!

Here's what you need:

Latex balloons, curling ribbon, something heavy to tie it to (if you're using helium), and cash (the more bills you use, the more obnoxious it is...go nuts...do all ones...hell, do pennies!)

If you're like me and have dysfunctional helium, get yourself some skewers or thin dowels and some tape.


Roll up your bills like so:

Insert into balloon:

Inflate!

Now here's where it got tricky...

If you have helium, it's super easy...tie off your balloons, tie on some ribbon and then attach the ribbon to your heavy thing and you're done.  Easy-peasy.  If you're using skewers, keep reading...

I had to tie the balloon off AROUND the skewer...simply knotting the ribbon around the already tied off balloon did not work.  Then add your ribbon (it helps fill in the gaps between balloons.  Curl that ribbon.  Once you've done this with all your balloons (I did 5...I wouldn't recommend any more than that), tape all the skewers together as though you're making a balloon bouquet.  Using more of that ribbon, attach the balloon bouquet to your object of choice...secure it well!!!  All done!  Here's what my finished product looks like:

The 'GRAD' is actually a photo holder and the skewers are attached to the wire photo holder thingy.  

Now my husband wanted me to add glitter or confetti to the balloons so that when she popped them, she'd have glitter rain down on her...which in theory is cool.  However...have you ever tried to get rid of glitter?  They don't call it the herpes of the art world for nothing....


Wednesday, May 8, 2013

Mother's Day Gift Wrapping


Mother's Day is right around the corner and for once this year, I'm on top of it!  Typically, I  buy a card and take my mom out to lunch...I always forget the card at home and Mom ends up stealing the check.  Not this year!  This year, I got my mom and mom-in-law a lovely gift...not telling what it is though ;-)  As you may remember from my Christmas post about gift wrap, I feel the packaging is just as important as what's inside. You know how they say 'you eat with your eyes first'?  Well I feel the same principle applies here.  You see a beautifully wrapped gift and you're automatically excited for what's inside!  Here I've chosen to use two equally beautiful but drastically different wrappings.  

The first is probably the most simple thing I've ever done in terms of wrapping.  White paper, purple ribbon in a simple knot, and a feather/flower pin.  The flower serves double duty...both a beautiful embellishment and an added gift...I love embellishments that double as gifts! 

The second is a tissue paper pom pom tied on with white pearlized raffia.  The pouf is super easy!    


Simply stack squares of tissue paper (the more you use, the more dense your pom pom will be).  

Accordion fold it.


Trim any tissue that hangs over the edge.

Use a twisty tie or rubber band to secure the middle together.
Trim the ends.  For mine I rounded them, but you could trim them any way you like.
Separate and fluff each layer of tissue paper.  Use ribbon or tape to attache the pouf to your gift!


Wednesday, March 13, 2013

Stress-free Wedding Planning

All the little details matter.
Photo by Norman Yu Photography

Hi all!  As many of you know, planning your wedding can be very stressful due to the amount of work, decisions and money that goes into it!  As I near the end of my countdown, here are a few tips that have helped me along the way:

1.  Use a checklist

Whether you choose to use an online version or print one out, these tools are invaluable!  Personally, I'm using the knot.com checklist because it has everything broken down by when it needs to get done.  It really does help you to make sure you don't forget anything or leave anything to the last minute!

2.  Don't put things off

I know it seems like forever before you're walking down the aisle, but trust me...that time FLIES.  Aim to check off at least one item per week on your checklist to keep up with things.  Set reminders on your calendar for deadlines such as payments to your vendors and dress fittings.

3.  Decide on a theme early

The sooner you have an overall vision for your wedding, the less time it will take you to decide on other things.  For example...if you decided that your theme will be "Starry Night" after the VanGogh painting, you can rule out the butterfly motif on all your paper products.

4.  Keep your fiance in the loop

Most guys don't care about the wedding day...they just want to know when and where to show up.  However, it never hurts to let them know what's going on to avoid any problems later.  For me, I'd assumed that since we're a fairly non-traditional couple that we'd be doing our wedding pictures before the ceremony to save time.  When I talked to my fiance about our day-of schedule, he informed me that he actually didn't want us to see each other until we met at the aisle.  Big surprise!  So yes...make sure that you check in with him from time to time to make sure he gets what he wants out of the wedding...it's his wedding too!

5.  Take some time off from wedding talk

Yes, your wedding is a big deal and deserves your attention and hard work, but don't run yourself ragged.  This is a special time in your life and you should get to enjoy it.  If you're feeling really stressed out, take a break!  Enjoy coffee with your friends or a date night with your fiance...and DON'T talk about the wedding! Or just chill out on your own with a good book and a piece of chocolate!
It's always good to treat yourself!

Saturday, February 16, 2013

Pretty Programs

Photo by Norman Yu Photography

As I mentioned in my last post, a great way to save on your wedding is to keep it simple with your paper products.  Even basic wedding programs can cost big bucks when you pay someone else to do them.  Let me be real with you for a minute...no one else gives a crap what your programs look like.  Seriously.  I'm sorry, I know, your heart is breaking and the image of fancy programs complete with ribbons and pearls and hand calligraphy are turning to mist before your eyes.  I'm sorry to burst your bubble, but I had to be honest with you.

The fact of the matter is, once the wedding is over, most guests will throw those programs away and never think about them again...if they even remember to take them home at all.  The purpose of a program is to let your guests know the order of ceremony and maybe the who's who of your wedding party.  Anything else is extra.  Yes, it's nice to share your love story in 10 pages or less, but come ON people...most of them know your story and if they don't, it's ok...they know how it ends!

So.  Now that we've gotten over ourselves let's get down to business making the nicest possible programs for the least amount of money...because the less you spend on paper the more you can spend on that honeymoon you want!

First...to the paper aisle!!
I'd recommend something heavier than printer paper.  You want it to be stiff enough to hold it's own.  I would go with card stock, which comes in a variety of colors and finishes.  I chose a pearl finish ivory card stock...very classy looking.  50 sheets for $11.99 at my Office Depot.

Second...formatting
To make an inexpensive project look more professional, I chose to print my programs two to a page longways...so they're long and thin.  You can definitely do yours differently, but I thought these looked more modern.  Unless you're going for a more contemporary design, center your text.  Test out different fonts to make sure that they are legible and that they fit on the page.  I know the calligraphy-like fonts are pretty, but they're no go to you if no one can read them.  I'd also save anything super fancy for the headings and let the regular text be a little more structured.

Third...TEST PAGE!
I cannot stress this enough: print. a. test. page.  DO IT.  You would be really pissed if you hit print on 100 programs only to find out that it cut off a line at the bottom or the heading was just a smidge too low on the page.  Plus, this give you and extra opportunity to check spellings and such.  Trust me...it's better to triple check something than to have to do it over.

Fourth...when in doubt, get some help.
For some reason, my printer hates me.  It never cooperates with anything I try to print.  I took my program in to Office Depot on a flash drive, and the girls at the printing desk did the rest...they even put my full sheets into their handy dandy cutting contraption and sliced my programs for me...a much better job than I could have done myself.

The end result was lovely and exactly what I wanted.  In total I spent $23 and some change for 100 programs.  That included the cardstock, formatting fee, printing, and cutting.  If you're looking for something even more fancy, you are welcome to print on vellum and use ribbon to attach them to some cardstock or doll them up with stick on gems (Martha Stewart's line has some really pretty ones).  Bottom line...you don't have to spend big bucks to have something nice!

Saturday, December 1, 2012

Christmas Gift Wrap

Ever heard the saying, "you eat with your eyes first,"?  I 100% agree with that and I like to take it a step further...  I believe when you receive a beautifully wrapped package, you instantly get excited about what's inside.  I also believe that festive gifts can really make your home look like it's ready for Christmas!

These are my first few gifts that I got to wrapping this year.  Aren't they pretty?  Here's how I made them look so nifty:

The center gift is wrapped in plain brown packing paper...not unlike a paper bag, but in a roll.  I found mine on sale at Walgreens, but you can find this stuff anywhere they sell office supplies.  I tied a ribbon around it vertically with no bow but extra give in the front allowing for the gather.  I used red curling ribbon to cinch the middle and attached two jingle bells and a glittery gold "Merry Christmas" ornament (both purchased at the dollar store...bells 9/$1 and ornaments 5/$1).  

The gift on the right is a plain red bag with two floral picks attached and a bow in the middle...all of that also from the dollar store.  

Not bad, huh?  There are lots of ways to make your gifts look extra special without spending a lot on fancy wrapping paper and big bows.  If you have some tips, please share in the comments below!

Wednesday, June 6, 2012

Fun with Finger Paint

Since this is Aaron's first official Father's Day, I wanted to do something special for him.  Now, I'm not working, so I can't go out and get him the grill he drools over every time we go to Home Depot (yawn).  I asked him what he wanted and got the usual response of, "Dear, I don't need anything."  *Sigh*  Typical man...and they say WE'RE hard to figure out!  But let's just not go there...

So I asked myself...what do you get the man who doesn't want anything?  I suppose it should really be from Ayden, so maybe something Ayden can have a hand in?  He's only 7 months old, so there's not a lot he can do besides drool.  So I went to my trusty Pinterest board in search of inspiration.  Eureka!  I saw a pin I had about edible homemade finger paints...and another for art made from letter stickers creating sort of a negative image on a painting (sounds weird...you'll see what I mean).

So I made the finger paints...way easier than I expected.  I made three colors of which I thought would look cute together.  I took an 8x10 piece of canvas panel and, using letter stickers, added 'I love you'.  Canvas panel has the texture of canvas but it's not wrapped around a frame.  It's flat, so I figured it'd be easier to frame and if we didn't add a frame, I wouldn't have to worry about painting the edges.


Once the paints had cooled and the letters were affixed to the boards, I let Ayden have at it.  It took a bit of coaxing and showing him how it's done before he dove in.  I found that, at least for his age, it was easier to pour some paint on the panel and let him swirl it around.


Once the paint has dried (I let mine sit overnight), you can carefully peel the letters off, revealing the white beneath.  Some of the paint bled under on mine, but I think it actually looks pretty cool that way.

A tasty masterpiece


If you want to spend a little extra time and effort on this, you can paint the panel a solid color that you like and let your kids paint a different color over it...I personally prefer the white, though.

An additional word of caution...food coloring stains...so cover everything!  Also...have a bath ready to go for when your kids are finished...mind went directly into the sink to get suds up so we didn't mess up the rest of the house!

Ayden getting clean in the sink...he found Nemo!


Recipe for finger paints:
2 tbsp sugar
1/3 cup flour
1 cup water

1.  Add all ingredients to a saucepan.  Whisk until smooth.

2.  Heat to medium low and stir continuously until thickened. 


3.  Separate into cups and use food coloring to reach your desired color.  Let cool!