Showing posts with label easy. Show all posts

Friday, August 1, 2014

Basic Roast Chicken and Potatoes

So here's the "sitch"...my husband is allergic to poultry.  Not sure if I've ever mentioned it, but it's weird and worth noting before I go into this recipe and why it's such a big deal for me.  I haven't cooked chicken in YEARS because I was always so afraid of cross-contamination and frankly, not willing to make two completely different proteins for one meal.  As of late, our work schedules are pretty opposite of one another, so my son and I find ourselves having dinner sans Daddy.  Which sucks.  Big time.  I miss our family meals and I really lost my passion for making nice dinners since my sole dining companion is 2 and isn't a very...appreciative diner.  We've been getting by on quick pasta dishes, loaded baked potatoes, soup, etc...you know, easy one-pot type stuff.  That is, until I had an epiphany...since I'm not cooking for the hubs, I can make chicken!  Woohoo!  I know...small victory...just give me this one, mkay?
Some of the basics...

Since I'm all grown up now, I figured I should master how to roast a whole chicken.  It's a basic recipe and easy to pull out for company...everyone loves it.  If you don't already have this one in your arsenal, read on, and if you already do...read on anyway, because this isn't your average roast chicken ;-)


Preheat your oven to 400 degrees.  Chop some red potatoes into bite sized chunks and toss with a splash of olive oil, salt, pepper, and thyme.  Toss 'em in a baking dish and set aside whilst you prepare the bird!
Mmmm butter...and other stuff.

Grab yourself some buttah' and let it soften...if you're like me and wait until the last minute to get it
out and start cooking, zap it in the microwave for about 10 seconds...that should do it.  Chop up a handful of parsley, zest a lemon, and mince 2 cloves of garlic.  Mix well and set aside.

Now, the important difference between your average roast chicken recipe and this one is the butchering of the chicken.  Some call it butterflying, others call it spatchcocking...whatever you call it, it helps the chicken cook more evenly and it can even cook faster.  Get yourself a nice, whole chicken.  Rinse and pat dry (both inside and out....and remove all the...innards).  Flip it over and, using poultry shears, cut out the spine.  Then you cut notches in the cartilage on either side of the breast bone and yank that out.  But do it nicely...you don't want to tear up your chicken.  Then you flip it over and voila! You have a beautifully butterflied chicken.  Check out this helpful video that I used to learn this technique.

Awaiting the oven...
After.  Look at all that crispy skin!
Splay out that bird on a baking sheet (rimmed, of course) and
retrieve your butter mixture.  Slather that stuff all over the top of the bird...make sure you get all the exposed skin with it...trust me.  Season with a little salt and pepper.

Both the potatoes and the chicken can go in together.  In about 30 minutes, remove the potatoes and stir them around so they get crisp on all sides and return to the oven.  Continue baking for another 15-30 minutes.  You'll know your chicken is finished when the thigh meat registers a temperature of 165 degrees and the juices run clear.  Carve it up and serve it along side those tasty taters and a fresh green salad.  YUM!
You can't tell me that doesn't look tasty!

Oh, and bonus...you can squeeze the lemon juice from that lemon you zested earlier over pretty much the entire meal and it gives it a little extra zip!


Ingredients:
1 whole chicken
2 tbsp butter, softened
1/2 c parsley, chopped
2 cloves garlic, minced
zest of 1 lemon
4-6 red potatoes, cut to 1" pieces
2 tbsp olive oil
1 tsp thyme
Salt and pepper

1.  Preheat oven to 400 degrees F.  Rinse and pat dry the chicken, removing everything from the cavity.  Spatchcock if desired and place on baking dish.

2.  Combine butter, parsley, garlic, and lemon zest.  Mix well and slather on bird.  Season liberally with salt and pepper

3.  Toss potatoes in olive oil, thyme, salt and pepper.  Place in separate baking dish.

4.  Bake together for approximately 1 hour or until internal temperature reaches 165 degrees and juices run clear.  Stir potatoes at 30 minutes and return to oven for the remainder of the hour.

Wednesday, September 25, 2013

Tiny Hands in the Kitchen

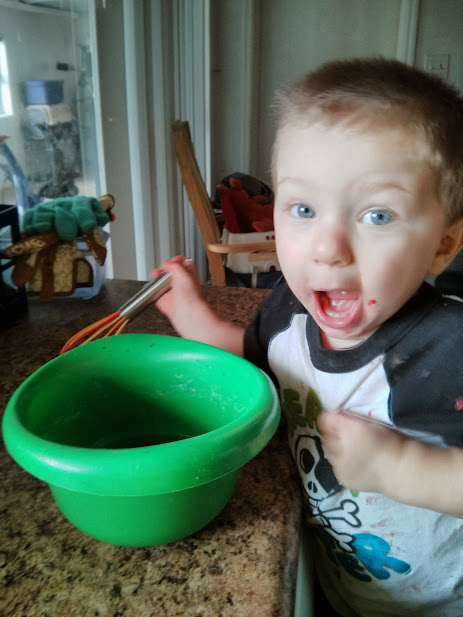
Toddlers are famous for their 'monkey see, monkey do,' behavior.  They love doing all the things they see mommy and daddy doing...whether we'd like them to or not!  My son watches me cook all the time and it's a struggle to keep him out of the kitchen.  So every once and a while, I bring him into the kitchen for an Ayden-friendly recipe.

When bringing a little one into the kitchen, preparation is key.  Pick a space and clear the area.  I have a small section of counter over the dishwasher that's next to the sink that I use for Ayden.  There are no rugs beneath and I keep everything on the counter off or out of reach.  I gather all that I need and have it ready to go before bringing him in. I also have a washcloth and a clean set of play clothes at the ready for when we're done!

This time, we made sugar free strawberry jello with real strawberries.  I handled the hot water and Ayden did all the stirring.  I thawed and chopped the strawberries ahead of time and he got to add them into the jello.  There was lots of sampling with the strawberries, so make sure you have extra!  Little ones are more likely to eat the finished product if they're familiar with all the ingredients, so it's good for them to taste the pieces as it's coming together.

Stirring like a pro!


I only used about half the bag of strawberries for this one.


As an added bonus, I made these in individual cups so it's quick and easy to pull out later!


There's no real recipe here...just follow the package instructions on the jello box and toss in your desired amount of fruit...you can't really  have too much fruit, in my opinion.  We just had so much fun with this, I thought I'd share!

If you enjoyed this post and want to see more ways to have fun with your little ones, check out this post.

Saturday, August 31, 2013

Low Carb Guac-Burger Wrap

When we adopted a low carb lifestyle, we were forced to give up a lot of old favorites.  Mac and cheese, pizza, burgers...and after a while, you really start to miss them.  It's not that I can't have them, but I can't have them all the time and really, I don't want to eat that way anymore...I'd rather be healthy.  So I have to find a way to incorporate those flavors into our new lifestyle by tweaking the recipes a bit.  One thing we both had a craving for was a good, juicy burger.  Here's our take on it:

2 low carb tortillas
1 lb ground beef (I prefer 85/15)
1 avocado
1/2 cup shredded cheddar cheese
1 green onion
1 cayenne pepper (I used fresh cayenne from the garden, you can also used powdered cayenne)
1 tbsp fresh chopped cilantro
salt, pepper, garlic powder, and lime juice all to taste

1.  Preheat the grill to medium heat.  Meanwhile, mix up the ground beef with your desired spices.  I used garlic powder, salt and pepper.  Form into long, thin patties.  When the grill is hot, place patties on the grill and cook to desired temperature.

2.  While the burgers cook, open the avocado and remove the flesh.  Put this either into a small food processor or a small bowl and mash with a fork.  Add garlic powder, salt, lime juice, cilantro, cayenne pepper, and green onion.  Mix well.

3.  When the patties are cooked to your liking, remove from heat.  

4.  Assemble the wraps.  Place the tortilla on a plate and the patties down the center.  Top with guacamole and cheese.  Wrap and eat!

These were delicious and really hit the spot!  I hope you enjoy them!

One Caffeine Free Week

Hi, my name is Melissa and I'm a caffeine addict.  I really only have maybe one cup of coffee per day and I only drink soda when we're eating out.  My real vice: tea.

I LOVE iced tea.  I make it unsweetened and use Splenda.  I drink it morning, noon and night.  Now most of you are laughing at me because tea is actually pretty healthy in comparison to soda, right?  I'm inclined to agree.  But I'm not a doctor and my husband seems to think he knows better than me...he claims that black tea is not really that good for you because it contains caffeine and if I'm going to drink tea it should be green tea.  Two things:  screw him and pass me the Splenda.  No really, I dug my heels in on this one.  I have given up carbs...no potatoes, no rice, no bread, no sugar...hell, I don't even eat most fruits!  I was NOT giving up that beautiful amber elixir of the gods.  No.  Just no.  But after a "discussion" about the evils of caffeine, he somehow talked me into going one week without all beverages besides water.  

So one other thing you should know about me:  I HATE water.  I hate water more than I love tea.  For me, water is good for three things:  cooking, cleaning, and making tea.  That's it.  You don't drink it because it's gross...it doesn't taste like anything!  Yuck!

So my first day sans caffeine was pretty rough, I won't lie.  I barely drank anything because I loathe the "flavor" of water so much...which living in Florida in August, that's just not a good idea.  I was miserable.  I felt like garbage.  But, I'm stubborn and wanted to prove to my husband that I could do it.  So on to day two...

Can we just agree that caffeine is a life-saver?  I'm fairly certain there were at least three instances where I seriously considered homicide to be a perfectly reasonable response to something my husband was doing.  I seem to remember one being because my husband helped himself to another helping of ice cream but had to dirty another bowl to do so. 

I think my lowest point was when I went to Publix the other day.  In order to get home, I have to drive by a Dunkin Donuts and all I kept thinking was, "they have awesome iced tea.  I think it's any size for 99 cents and I could probably suck it down before I get home...he'd never know!"  I am proud to tell you that I resisted temptation.  However, it didn't strike me until later, recounting my story to my husband, that I really might have a problem.  I considered "cheating" for a glass of tea.  I could have gotten a doughnut!  If I was going to cheat, wouldn't that be the thing I want most?  The doughnut I haven't had in MONTHS vs. the tea I got to have three days ago!?!?  

Fast forward, the week is over and it's not so bad.  I actually discovered a little recipe, if you will, that makes water more palatable.  I've been sucking down this water like it's going out of style and I feel GREAT.  I woke up this morning and didn't miss the coffee or the tea.  I don't get headaches from the withdrawal, and I just feel better about myself for making another healthy choice.  So anyway, here's my 'recipe.'
I keep mine in 2 qt bottles.

1 gallon water (I used the filtered stuff from the fridge)
2 limes
1 lemon
1/2 cucumber

1. Wash and slice your produce.
2.  Add to water.  Refrigerate for at least an hour.
3. Drink in copious amounts.  :-)

I read on Pinterest, where I originally found this little recipe, that lemons aid in the absorption of sugars and calcium and help to curb your sweet tooth, limes promote a healthy digestive tract, and cucumber acts as a diuretic and flush fat cells.  The original recipe calls for mint, as well, but I didn't have any one hand.  I plan to pick some up the next time I'm out.  Just another little tip...when you add mint to a drink like this, give it a little spank...it releases some of the oils in the leaves without completely tearing it up.

Oh, and just FYI...we're on week four of our low-carb lifestyle and I'm down 11 pounds!  Yay!

Monday, June 10, 2013

Father's Day Craft

Last year, Ayden and I had a blast making our finger paint art.  This year, the pressure was on to top that!  So...we got Daddy a new puppy!  We adopted (after much discussion) a Great Dane-Shepherd mix puppy and we're so excited!  Meet Kahlua Pi...
Yes, this is how she likes to lay...don't ask.


Ok, so not what you were expecting?  Thought so...  No worries, Ayden and I still whipped up a little something for Father's Day! We made two different things for two very special guys.  A shadow box and hand print coasters.

The shadowbox is super easy.  I purchased a shadow box frame from Michael's, a sheet of peel-and-stick scrapbook paper, photo corners, pre-cut paper circles, some raffia ribbon, glue, acrylic paint and a 3D sticker. Here's the finished product:


The picture really doesn't do the project justice, but I'm having issues finding good light these days (my apologies).  On the top left is Ayden's hand print on the pre-cut circle paper.  Super easy...using a sponge wedge, I coated my little man's hand with acrylic paint, stamped it onto the paper and used a baby wipe to wash of the paint...easy-peasy.  I poked a couple holes in the top, tied a raffia bow, and glued it to the shadow box.  Top right is the 3D sticker, found in the scrapbooking aisle.  On the bottom are two prints from our wedding secured to the box with photo corners.  The cool thing about the photo corners is they're peel and stick, so they were easy to use and also, if the recipient should desire to change the photos, they're easy to remove...but they won't fall off on their own.

Project number two is a set of slate coasters with hand prints on them (yes, I'm in a hand print phase...so sue me).  You can do this project on regular tiles if you prefer...I just liked the look of the slate and they already had felt on the bottom to keep them from scratching the furniture.  

To make these all you need is your base of choice (slate coasters, tiles, whatever), acrylic paint, sponge brush, and modge podge.  Make sure your base is clean and dry.  Coat your little one's hand in paint and stamp it onto the coaster.  Let dry completely.  Using sponge brush, apply a coat of modge podge.  Allow to dry completely.  Add a second coat of modge podge if desired.  

Now I will say this about my coasters...if I had it to do over again, I'd go with white paint...or pretty much any color besides 'bloody hand print red.'  Maybe I should save them for a Halloween gift??  But other than that, they turned out pretty good and were super easy.  And cheap...did I mention this project was less than $10?

Well friends, happy crafting and to all the dads out there, Happy Father's Day!  


Wednesday, June 13, 2012

Cookie Time!

Not sure if I mentioned this already, but we live in a cookie house.  Some homes have cakes, brownies, or Little Debbies, but ours...we have cookies.  So I was having a cookie craving and went to the cupboard to gather my ingredients and then...*gasp!*...we have no...chocolate chips?!  WHAT?!  When did this travesty occur?  How could I have been so unprepared?!

Ok, so maybe I'm being a little dramatic.  But hey, when you want a cookie, it can feel like a matter of life or death!  What to do...well I have about a thousand cake mixes up there that I will probably never use, so I seriously considered making a cake.  Ugh, but then there's the whole thing where you have to let it cool and frost it and even then...it's just not a cookie!

Did you know you can make cookies from a cake mix?  So yeah...say good bye to my cake mixes and hello to tasty cookie goodness!  It's surprisingly easy and requires only two extra ingredients.  Like with cookies, you can mix in additional things like chocolate chips, raisins, etc.


Cake Mix Cookies
1 pkg cake mix (average size...not family size)
2 large eggs
1/3 cup vegetable oil

1.  Preheat oven to 350.  Mix all ingredients well.

2.  Spoon onto baking sheet.  Bake for 8-10 minutes.

3.  Allow to cool.  Frost if you like.


Monday, June 4, 2012

Company's Coming French Toast

Like most of you, when I have a house guest, I like to roll out the red carpet and make them feel welcome in my home.  I try to make sure their sheets are fresh, extra towels are in the bathroom, and that they always have a full belly.  This weekend, my sister came to visit and I made her this french toast because it's her favorite.  It's looks fancy, tastes amazing, and is surprisingly easy to make.

Pepperidge Farm Swirl Bread
The first secret to making 'fancy french toast' is the bread.  I cheat.  I totally cheat.  I don't go out and get gourmet brioche or anything like that.  I certainly don't make my own...seriously, what do I look like, Betty Crocker?  Plus, I have company over...the last thing I want to do is spend all day in the kitchen!  I get Pepperidge Farm Swirl Bread.  Publix has them on sale once and a while for buy one get one free...so I grab a couple of loaves and stick them in the freezer.  You can thaw two slices at a time (about 5 seconds in the microwave or a few minutes on the counter) or you can thaw the whole loaf (about 20 seconds in the microwave or about 30 minutes on the counter).  It give the french toast amazing flavor AND it looks pretty...and everyone will think you're a genius when they taste it!  

To make the french toast, you need to make the 'batter' which is basically a custard.  You can make it the night before if you like.    I adapted the recipe from one that Alton Brown uses.  His is great and all, but I don't usually have half and half in my house.  

Company's Coming French Toast

1 cup milk
2 tablespoons melted butter
3 eggs
2 tbsp honey (warmed in microwave for 20 seconds)
1/4 tsp salt
8 slices of swirl bread
Additional butter for griddle.


1. Preheat griddle to medium high heat and the oven to 350.  Mix the first 5 ingredients together with a whisk until smooth. 

2.  Coat griddle with butter (or use nonstick cooking spray...but the butter tastes better!).

3.  Dip bread in the custard mixture...give it a good dunk on each side.

4.  Lay carefully on the griddle and let cook on each side for 3 minutes.  Remove to the oven rack for 5 minutes.

5.  Serve hot with your choice of toppings.


Thursday, May 31, 2012

Caramel Apple Dip

When I was a kid, my dad made this amazing caramel apple dip for me.  It was so good that I used to use the apple slices like a spoon when he wasn't looking!  Now that I'm "grown up" I figured I should learn to make it for myself.  Turns out...the magic dip isn't all that hard!  It only needs three ingredients that you might have lurking in your kitchen already...and you can make it ahead for a party if you need to.

What you need:
1 8oz package cream cheese
1/4 cup brown sugar
1/4 cup caramel ice cream topping
apples for dipping

1.  Cut cream cheese into cubes and soften in the microwave (30 seconds on high).  Using a hand mixer, blend until smooth.
2.  Add brown sugar.  Cream together until smooth with mixer.
 3.  Add caramel sauce.  Mix well.  Serve with apple slices!

That's it!  See...really easy.  If you're watching your sugar intake, you can substitute the caramel sauce for the sugar free version and swap regular brown sugar for the Splenda brown sugar blend (just be sure to consult the measurement conversion chart).  Yum!

Thursday, May 24, 2012

The Perfect Glass of Iced Tea

I'm sitting here on this beautiful, sunny Florida day thinking to myself, "I'm parched."  Hmm...well considering I'm not purchasing any groceries for a while, I don't want to waste the liter of diet Coke in the fridge, I'm not in the mood for water and my darling boyfriend decided to drink my last Starbucks Refresher...what libation can I concoct?  Well duh...ice tea!  We've had tea bags in our pantry forEVER since we bought some and my dad always gives us a box when he buys them at Publix as a BOGO.

One problem.  I SUCK at making good tea.  I'm so ashamed.  I grew up on iced tea, but for some reason whenever I make it, it's bitter and just in general icky.  Yes, icky...it's a technical term.  Now, the bf likes 'sun tea' where I place water and about a zillion bags of tea in a glass jar and leave it outside for a day or two until the water becomes an almost black liquid that I'm convinced is not fit for human consumption.  Ok, well that isn't really how sun tea ought to be...but that's how he likes it.  He's weird, I know.  But what I'm after is that cool, amber colored liquid that just quenches the most unquenchable thirst.

So, I slink to my computer and pull up my Pinterest board because I seem to remember pinning something about how to make the perfect sweet tea at one point.   And in my shame, I actually read a recipe for making good tea.  Turns out...I've been missing an ingredient that really surprised me: baking soda.

Off I go to make some tea...here goes nothing!
What you'll need:
8 cups water
2 family sized bags of tea (or 6 regular bags)
8 cup Pyrex bowl (or similar)
a pinch of baking soda (not pictured)
A vessel of choice to hold the final product

First step...boil 2 cups of water.  Pour the boiling water (carefully!) into the 8 cup Pyrex bowl.

Add the tea bags, keeping the tags out of the water.  Let steep.  (I steeped mine for about 10 minutes.  It really depends on how strong you like your tea...just remember that it's going to be diluted in the next step.)

Add a pinch of baking soda.
Chemistry Lesson!  Tea contains tannic acid, more commonly referred to as TANNIN.  This is what makes tea bitter.  Baking soda is a base, so adding it to an acid neutralizes it, resulting in a reduction of bitterness!

Remove tea bags, squeezing as much liquid out before you discard them (careful not to burn yourself).  Dilute with 6 cups of cold water.  Pour into a container of your choice and store in the refrigerator.

NOTE!  If you prefer SWEET tea, add sugar while it's still hot.  That's it!  I, myself, prefer to use Splenda and add it to my glass...that way anyone else who drinks it can make it as sweet (or not) as they like!